

Choose options

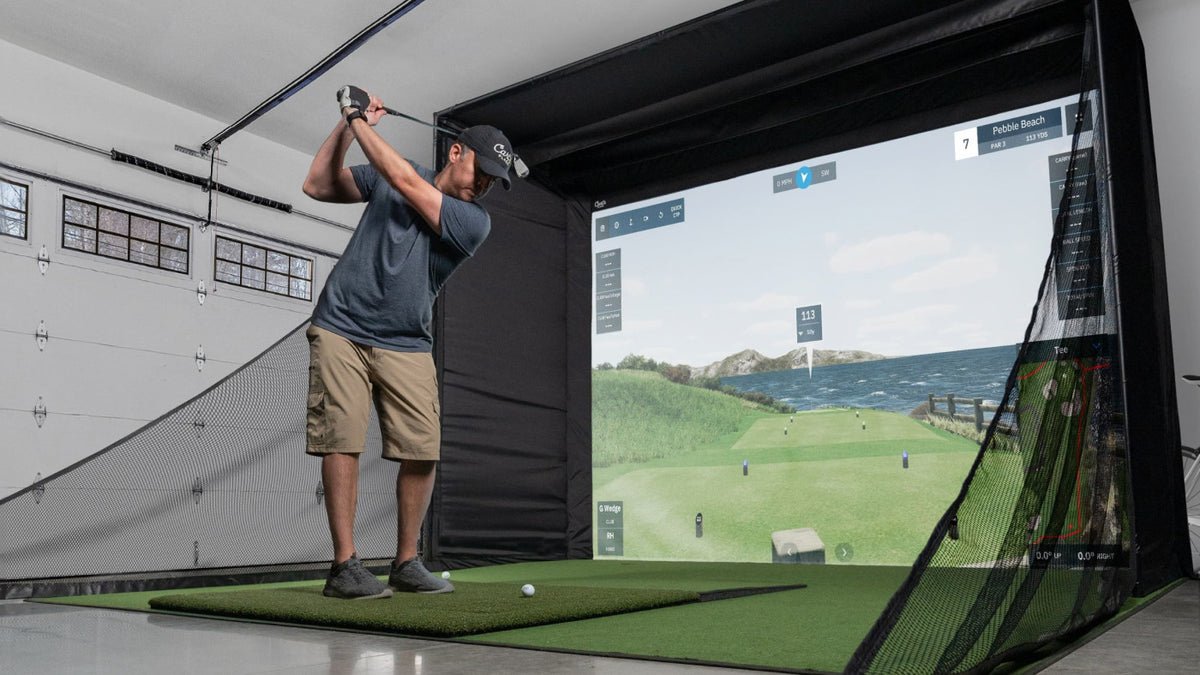
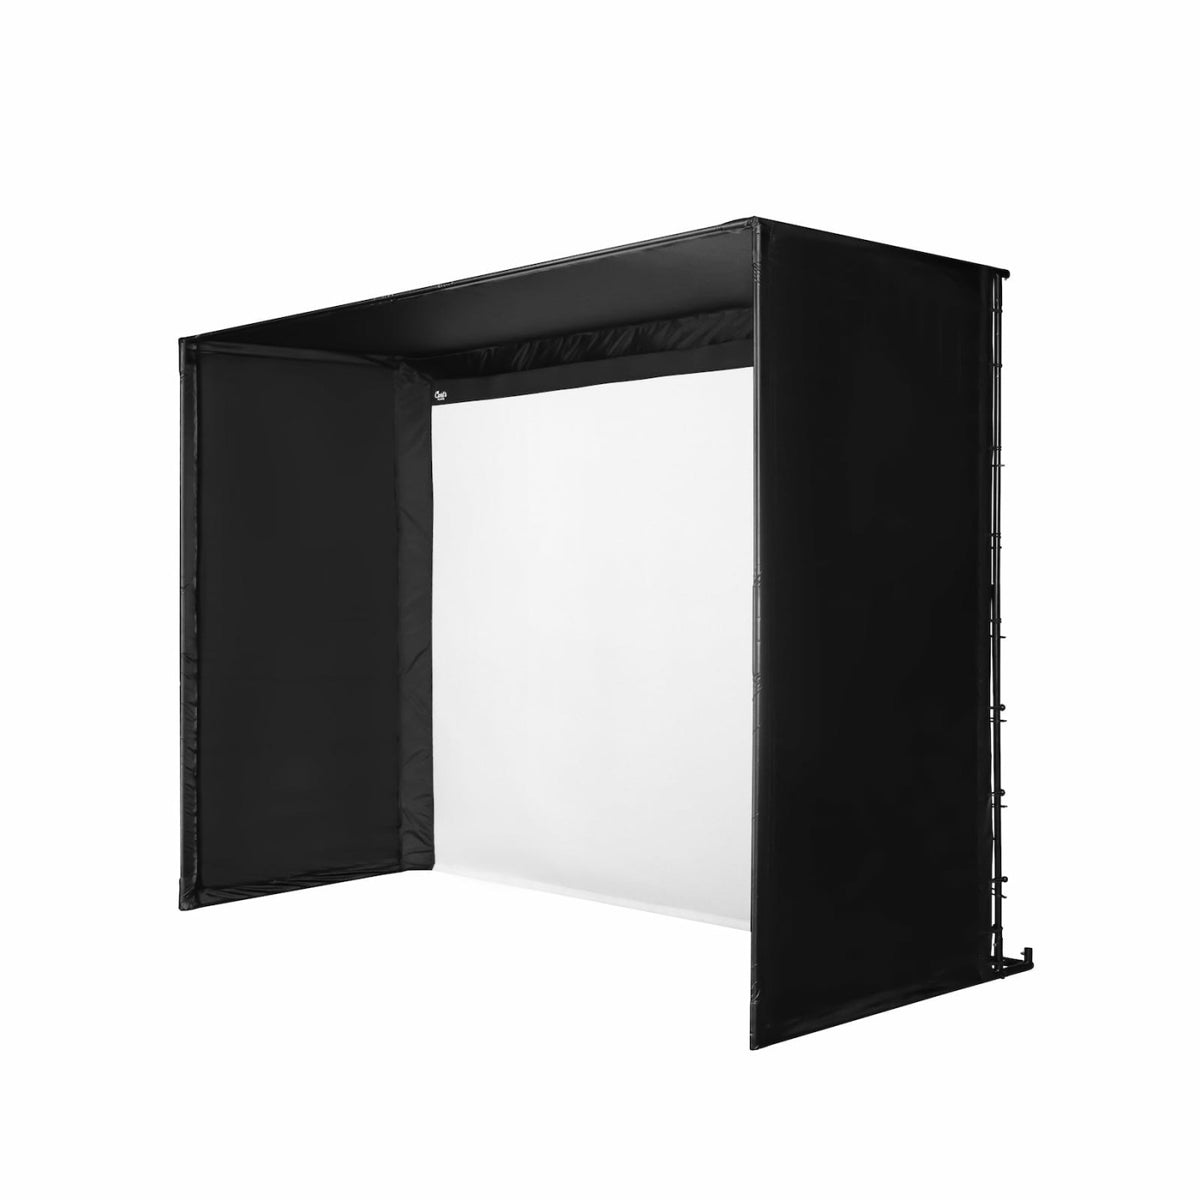
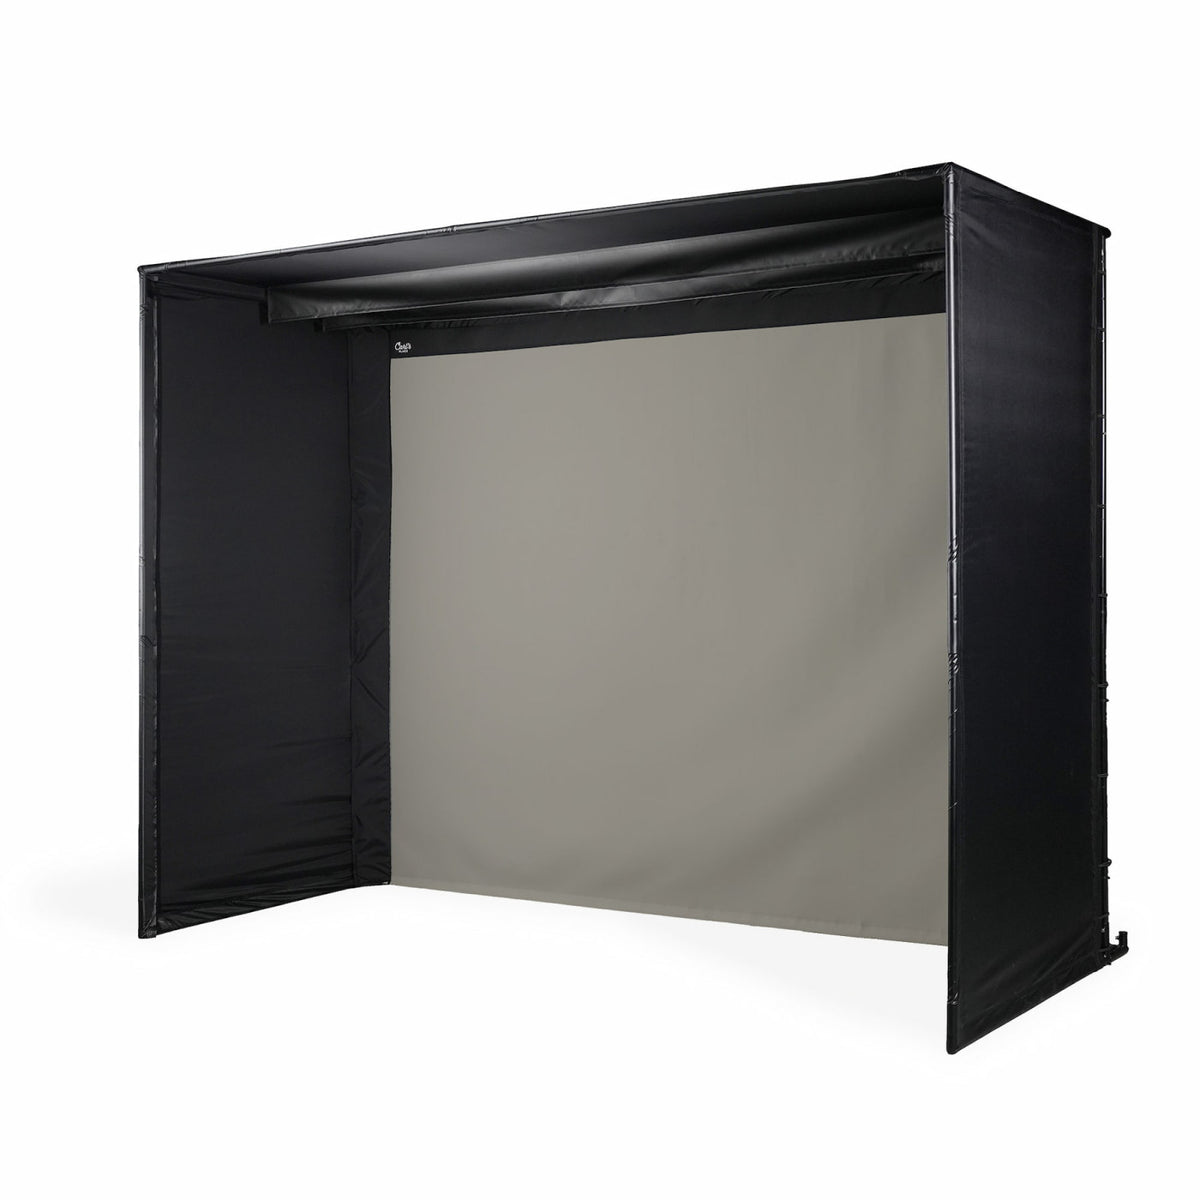
Create a Professional Golf Simulator Experience with a Carl's Place Golf DIY Enclosure
Bring the excitement of the golf course indoors with a Carl's Place Golf DIY Simulator Enclosure Kit. Designed for golfers who want a clean, professional-quality simulator without the complexity of a custom build, this enclosure creates an immersive playing environment with a full-screen image that extends naturally to your hitting surface.
Each kit includes a Carl's Place Golf impact screen, durable black enclosure fabric, precision frame fittings, and the hardware needed to assemble your enclosure. Simply add compatible EMT tubing or upgrade to the optional Carl's Place Golf Pipe Framing Kit for a convenient, ready-to-build solution.
Product Details
Turn your garage, basement, spare bedroom, or dedicated golf room into a year-round practice facility with a Carl's Place Golf DIY Enclosure. Practice any time of day, play your favorite simulator courses, or enjoy friendly competition with family and friends—all without leaving home.
To maximize your simulator experience, pair your enclosure with a quality launch monitor. Today's launch monitors provide detailed swing and ball-flight analysis, including ball speed, launch angle, spin rates, carry distance, club path, smash factor, and other valuable performance data. This instant feedback helps golfers improve faster by making every practice session more productive.
Whether you're building your first home simulator or upgrading an existing setup, a Carl's Place Golf Enclosure provides the durable foundation needed for realistic practice and long-lasting performance.
What's Included?
Choose Your Carl's Place Golf Impact Screen
Every Carl's Place Golf DIY Enclosure Kit can be configured with one of four premium impact screen materials, allowing you to select the ideal combination of image quality, durability, and performance for your simulator.
Choose from:
- Standard Golf Impact Screen
- Preferred Golf Impact Screen
- Premium Golf Impact Screen
- High-Contrast Gray Premium Golf Impact Screen
Each screen is engineered to produce a bright, immersive image while providing excellent ball absorption and long-term durability. The seamless floor-to-screen appearance creates a realistic playing environment, while the carefully engineered materials help minimize ball rebound and deliver consistent performance through thousands of shots.
Screen Material Guide
Not sure which impact screen is right for your simulator? Compare the features and performance of each Carl's Place Golf Impact Screen to determine which option best fits your room, lighting conditions, practice frequency, and budget.

Standard golf impact screen (far left)
• Budget material perfect for beginners
• 100% heavy-duty polyester
• Loosely woven
Preferred golf impact screen (center left)
• Smoother surface for better image quality
• 100% heavy-duty polyester
• Strong silicone reinforcement
• Tightly woven knit
Premium golf impact screen (center right)
• Smoothest surface available
• Superior image quality
• 3 layers of heavy-duty, impact-resistant polyester
• Noise-dampening center layer
High-Contrast Gray Premium golf impact screen (far right)
• Same top-of-the-line material as our Premium screen
• Allows for deeper blacks and richer colors
• Great for areas with more ambient light
BlackStop™ Enclosure
The durable black enclosure fabric creates a professional-style simulator bay while enhancing your projected image by reducing excess light around the impact screen. It also provides an added layer of protection by helping contain errant shots and reducing ball rebound outside the hitting area. This helps safeguard your walls, ceiling, and surrounding space while giving you greater confidence to swing freely during every practice session.
Designed for both home and commercial golf simulator installations, the enclosure creates a clean, finished appearance while keeping your practice area safer, more organized, and focused on the game.
Steel Fittings
Your DIY Golf Simulator Enclosure Kit comes complete with the heavy-duty corner fittings needed to construct a secure, professional-quality frame. Add compatible frame tubing (available separately) to create a durable foundation that's designed to support years of indoor golf practice and simulator play.
Zip Ties
Every DIY Golf Simulator Enclosure Kit includes the attachment hardware needed to install and properly tension your impact screen and enclosure. Durable fasteners are provided to securely mount the screen to the frame while allowing you to fine-tune the amount of tension during installation.
Because every golfer and simulator setup is different, you can adjust the screen tension to match your hitting distance, swing speed, ball velocity, and overall playing style. Finding the right balance between a firm installation and controlled flexibility helps optimize image quality, reduce ball rebound, and extend the life of your impact screen. Extra fasteners are included, giving you the flexibility to make adjustments as your setup evolves.
FAQ
How far away should I stand from my impact screen?
For the best combination of player safety, screen performance, and long-term durability, we recommend positioning your hitting area at least 10 to 12 feet from the impact screen. This distance provides ample room for a full swing while helping the screen absorb each shot as intended, reducing excessive ball rebound and promoting a safer, more enjoyable simulator experience.
Can I Iron or Steam a Golf Impact Screen?
Applying direct heat can permanently damage the screen material and may reduce its performance over time.
For the best results, install the screen using the included mounting hardware and apply even tension across the entire surface. In most cases, minor wrinkles and fold lines will gradually relax on their own after the screen has been mounted for several days.
To minimize creasing before installation, remove the screen from its packaging as soon as possible. If you need to store it before assembly, avoid making tight folds and keep it loosely folded or gently rolled whenever practical. Allowing the screen to settle naturally is the safest and most effective way to achieve a smooth, professional-looking projection surface.
That being said...
We have also had success using a steamer to help get wrinkles and folds out. Using a clean, consumer-grade steamer with distilled water will help accelerate the wrinkle removing process, and should avoid leaving water marks on your screen.
Can I wash my golf screen material?
Check out this article for all our recommendations on 'How to Clean Your Golf Impact Screen'.
Golf Simulator Safety Tips
A properly installed golf simulator provides an enjoyable and effective way to practice year-round. Following a few basic safety guidelines will help create a secure environment for everyone using or observing your simulator.
- Follow all installation instructions to ensure your enclosure and components are assembled correctly and securely.
- Maintain a clear hitting area by keeping children, pets, and spectators well outside the golfer's swing path and ball flight zone.
- Protect your surroundings by making sure your simulator space is large enough and by using protective barriers or enclosure panels to help safeguard walls, ceilings, windows, lighting, vehicles, and other nearby property.
- Inspect your equipment regularly for loose hardware, worn components, or signs of damage before each use.
- Use only compatible golf balls and equipment recommended for your simulator setup to help maintain safe operation and extend the life of your impact screen.
- Review all product documentation, warranties, and usage guidelines before installation and operation to ensure your simulator is used as intended.
By following these recommendations, you'll create a safer, more enjoyable indoor golf experience while helping protect both your equipment and your practice space.
Do I Need a Golf Hitting Mat?
A quality golf hitting mat is one of the most important components of any indoor golf simulator. It provides a stable, comfortable surface for every shot while helping reduce stress on your feet, knees, and joints during extended practice sessions. The right mat also creates a more authentic playing experience by allowing you to tee the ball at a consistent height and swing with confidence.
Choosing the Right Size
Selecting the proper mat size depends on your available space and how the simulator will be used.
- 4' x 5' Hitting Mat – A great option for most golfers, offering enough room for a comfortable stance and full swings with every club, including the driver.
- 5' x 7' or 4' x 9' Hitting Mat – Ideal for golfers who prefer a wider stance or for simulator rooms shared by both right- and left-handed players. The additional width provides greater flexibility without repositioning the mat between shots.
Whether you're building a dedicated home simulator or a commercial golf studio, choosing the right hitting mat improves comfort, enhances realism, and helps protect both your body and your flooring for years of practice.
Choosing the Right Carl's Place Golf Enclosure
Carl's Place offers several golf simulator enclosure systems designed to fit different budgets, room sizes, and performance expectations. Whether you're building your first home simulator or outfitting a professional teaching studio, there's an enclosure designed for your space.
DIY Golf Simulator Enclosure Kit
The Carl's Place DIY Golf Simulator Enclosure Kit is an excellent solution for golfers looking to build a high-quality simulator without the expense of a fully assembled commercial enclosure. The kit includes the impact screen, enclosure fabric, corner fittings, and mounting hardware needed to create a professional-looking simulator bay. Simply add compatible frame tubing to complete the installation. It's a popular choice for garages, basements, bonus rooms, and dedicated home golf simulator spaces.
Pro Golf Simulator Enclosure Kit
Designed for golfers who want a premium simulator experience, the Carl's Place Pro Golf Enclosure Kit features larger enclosure options, enhanced construction, and additional safety features. The deeper design provides increased protection from errant shots while creating a more immersive hitting environment. It's well suited for serious home golfers, golf instructors, commercial simulator businesses, and indoor golf facilities.
Curved Golf Simulator Enclosure Kit
For the ultimate immersive experience, the Carl's Place Curved Golf Enclosure Kit combines the performance of the Pro enclosure with a panoramic curved impact screen. The wraparound design expands the golfer's field of view, creating a realistic simulation environment that's ideal for premium home installations, golf academies, entertainment venues, and commercial simulator centers.
Planning Your Golf Simulator Space
Selecting the correct enclosure size starts with accurately measuring your room. Allowing enough space around your simulator improves safety, performance, and overall enjoyment.
Before purchasing an enclosure, consider the following:
- Safety Clearance – Leave adequate space between the enclosure and surrounding walls or ceiling to help prevent damage from mis-hit golf balls and reduce unwanted ball rebound.
- Enclosure Dimensions – Verify the complete footprint of the enclosure, including any rear clearance required for the impact screen and frame.
- Hitting Distance – Position your hitting area approximately 10 to 12 feet from the impact screen to provide a comfortable swing and help the screen perform as designed.
- Ceiling Height – Ensure the tallest golfer can make a complete swing with every club, including the driver.
- Club Length & Swing Arc – Account for both golfer height and club length when evaluating your available space.
- Flooring & Room Features – Include the thickness of your hitting mat or turf, along with HVAC vents, soffits, lighting fixtures, beams, and other structural features.
- Room Accessibility – Make sure doors, walkways, storage areas, and seating remain accessible after the simulator is installed.
Taking time to properly measure your space before ordering will help ensure your Carl's Place Golf Enclosure fits correctly and provides a safe, enjoyable golf simulator experience for years to come.
When Will My Carl's Place Golf Enclosure Ship?
Every Carl's Place Golf Enclosure is built specifically for your selected configuration, allowing you to choose the enclosure size and screen material that best fits your simulator space. Because each order is prepared to your specifications, production times can vary depending on current manufacturing demand.
Before shipping, every enclosure is carefully inspected, packaged, and prepared to help ensure it arrives ready for installation. Estimated production, shipping, and delivery dates are displayed during checkout after you enter your shipping destination.
If you have a project deadline or installation date to meet, we recommend checking the estimated delivery schedule before placing your order or contacting our team for the latest production updates.
What If a Golf Ball Hits the Enclosure Fabric?
The black enclosure fabric is designed to help contain occasional mis-hit or rebounding golf balls, but it is not intended to be the primary impact surface. During normal play, incidental contact with the enclosure should not cause any issues. For the best performance and longest product life, always aim shots at the impact screen.
Can I Purchase a Replacement Impact Screen?
Yes. If your impact screen becomes worn or damaged, you can purchase a compatible replacement screen without replacing the entire enclosure. To ensure you receive the correct replacement for your enclosure size and screen material, contact Carl's Place Customer Service for assistance.
Carl's Place Customer Service: (608) 352-0002
You can also check out our Clearance section to see if you can snag a deal on a replacement golf screen that fits your setup.
Installation Guide
What Type of Pipe Is Required for a Carl's Place DIY Golf Enclosure?
Carl's Place DIY Golf Enclosures are designed to use 1-inch EMT (Electrical Metallic Tubing) to build the enclosure frame. EMT provides the strength and durability needed to properly support the impact screen and enclosure system.
For the easiest installation, you can add a Carl's Place Pipe Framing Kit, which includes pre-cut tubing sized specifically for your selected enclosure. If you prefer to source the tubing yourself, compatible 1-inch EMT is available at most home improvement and building supply stores. Your enclosure instructions will include the required pipe lengths and quantities.
How Long Does Assembly Take?
Most Carl's Place DIY Golf Enclosure Kits can be assembled in approximately one hour, depending on the enclosure size and your installation experience. Having a second person available can make the process quicker and easier, especially when installing larger enclosures.
What Is EMT Tubing?
EMT (Electrical Metallic Tubing), sometimes called electrical conduit, forms the structural frame for Carl's Place Golf Enclosures.
When building your enclosure:
- DIY Golf Enclosures require 1-inch EMT.
- Pro and Curved Golf Enclosures require 2-inch EMT.
PVC pipe is not compatible with Carl's Place frame fittings and should not be used.
There are two ways to obtain the required tubing:
- Purchase a Carl's Place Pipe Framing Kit, which includes pre-cut tubing designed for your enclosure size.
- Buy EMT tubing locally from a qualified building supply or home improvement retailer and cut it to the required dimensions.
Where Should I Mount My Golf Simulator Projector?
The ideal projector location depends on your projector's throw ratio, image size, and room dimensions. Before mounting your projector, confirm that it can produce the desired image size at the available distance from the impact screen.
Common projector mounting options include:
- Ceiling Mount – The most popular installation method for home golf simulators, keeping the projector safely out of the swing path.
- Drop Ceiling Mount – Recommended for rooms with higher ceilings where the projector needs to be lowered for proper image alignment.
- Frame Mount – Certain Carl's Place Pro Golf Enclosures support projector mounting directly to the enclosure frame for a clean, integrated installation.
- Floor Mount – Some short-throw projectors can be placed in front of the hitting area. If using this method, always protect the projector with a durable projector enclosure to help prevent damage from golf balls or clubs.
Proper projector placement is essential for creating a bright, accurately aligned image while maintaining a safe and clutter-free simulator environment